
XIEGU G90
Short wave SDRadio
The rig is a very nice package out of the box. Giving a number of cornerstone feature to a attractive pricing:
- All band shortwave radio
- 20watts output
- Built in autimatic antenna tuners
- SSB, CW, AM
- separate analogue in and output for digimodes from mini-DIN connector
- SDR ( Software Defined Radio ) architecture
- Small size and resonable weight – 40 x 120 x 180 mm, 1.5 kg
- Hand mike with button control
- Impressive little 1.5 inch OLED display.
- Detachable front panel – To be put remotely from radio unit.
After having had the radio for a couple of weeks time now I must say that Im pretty impressed with its performance. I like SDRadios and have a couple of them. The spectrum display/waterfall is a must when running a short wave radio, hunting for activity, unused space and evaluating stations on air.
The software in a SDR is a cornerstone for good performance. And of course here the G90 is doing a great job.
But no construction is perfect, and the G90 is no exception. Most stuff is ok, but I would limit this to about 75% of what I would like to see. A list of oddities have been sent to the factory / R&D to get fixed. I have installed FW 1.4 into my radio. Som updates are made.
Lets give you some examples:
- The Noise Blanker (NB) does have no real effect on the noise / interference. Also there is no way to set the level of the NB
- The compressor does not seem to do any difference to your output/sound. Also one can normally set levels in compression
- The display of the passband presents the passband for LSB and not USB. allthough selecting USB. Looks odd.
- In a SDRadio one can do pass band tuning (PBT) – I can see no function to this.
- There must be a more user friendly way of handling step rate on the VFO. Very often a step rate of 500Hz is needed. I would like to see a meny item where one could select the basic step rate per mode. From 10Hz to lets say 5kHz
- To activate the subfunctions of the buttons below the screen on has to hit the “FUNC”-button. It would be much better to activate the subfunctions by a “long push” of the button.
- The OLED display is great, and you can dim it with a quick push to the power button. It would be great to have it dimmed automatically after a variable time of inactivity.
- The text on the small push buttons is very hard to read in dim light. A portable radio like this often is used in them situations. I would expect that one can get them buttons back-lit.
- The menu structure is far from ready. Very hard to get around and one has a feeling that there are tons of functions that could be implemented.
The manual is a small leaflet of 38 pages. The English is ok but the content is less then adequate. And of top of that one can read in a couple of places about functions that yet are to be implemented. Like VOX….. Not even that is available in a radio when the calendar says 2019.
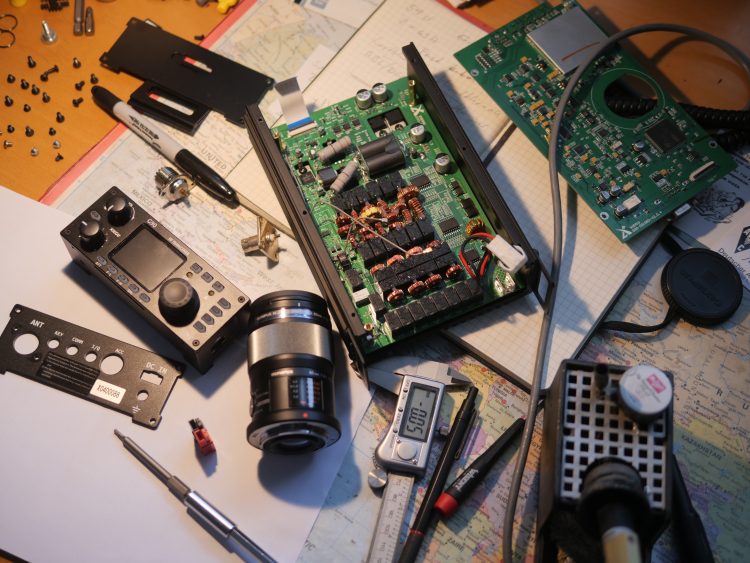
Modification and test articles
I have a upcoming test article to be published in the Swedish National ham radio magazine QTC. The reading is in Swedish ( Have fun).
I love the radio som much so i have bought it. You get a lot of radio for your money (About EUR 500.-) . Get yours from PilupDX.
Below i will publish some modification that I have doen to my radio. Though it would be of interest for you:
Antenna connector swap
On a QRP-radio the connections to the antenna can very well be with a BNC-connector. It is smaller, quicker to attach/remove coax for antenna and more watertight.
So here one can see the original SO239-connector, to be swapped for a BNC chassie-connector. You need to get one with a 25 mm flange and do some modifications to the flange with a hacksaw and file.
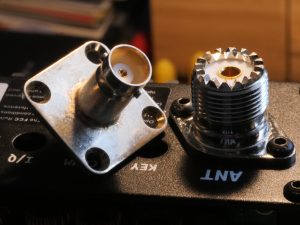
Here you see the connector types side by side before replacement.

It all looks nice from inside and outside. And best of all, you know have a BNC-connector on your XIEGU G90
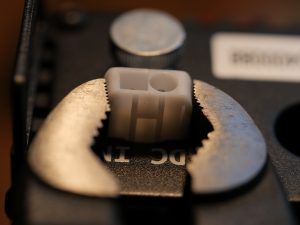
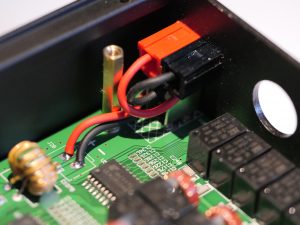
Power inlet swap
The original DC power inlet is not of the same standard used by my. So after some examination I found that it could not be that complicated to do a swap for a Anderson Power Pole connector.

As one can see the original hole is not far away from what is needed for the Anderson Powerpole. All needed is work with a needle file and some careful measurements. The new connector has some small notches that end up on the inside preventing it from coming out of the case. Do a close examination before cutting away to much metal.
Get the original bugger connector out with a suitable tool.
Get the old DC connector out of the case. Push in the latches on the side with a suitable heavy duty tool. While pushing them in, Push the connector inwards with your thumb.
Measure carefully, get a nice little file out of your toolbox and open up the hole just enough so that you can get in the Anderson PP:s. Block the PP:s from going back by a thin wire on the outside trough the hole between the two connectors.
From the pic you can see it all looks good. I did put a corresponding pair of Anderson PP:s to the original power lead (with fuse) så that the cable is reused.
So now my XIEGU G90 is with Anderson Power Pole and in line with the standard used in my shack.